

 How To Finish Hems Without Serger & Add Casing For Elastic
Monday, August 24 2015
How To Finish Hems Without Serger & Add Casing For Elastic
Monday, August 24 2015
The ‘secret’ is…..binding! I promise you, once you have tried to bind hems you will love it! But promise me, that you will take the time to read this tutorial with PLENTY of time on your hands! ‘k?
Further, this tutorial shows you a great way on how to prevent adding elastic by sewing with elastic thread, a.k.a. shirring. Some machines have trouble shirring so this tutorial will give you a tip on how to use regular band elastic.
I am using an amazing fabric called ‘Double Gauze’ in blue by Organic Cotton Plus. OMG! The quality is beyond anything you will ever know! I picked this fabric just to work on something different than organic knit fabric which I have LOVED reviewing. See in THIS post and in THIS one. I was lucky to get to pick two different things, the gauze and some beautiful lace in off-white, almost beige. I loved the combo with the denim/off-white of the double gauze and the off-white lace. the lace is grippy and simply lucious, almost looks like tea stained. It’s organic and that is worth SO much!
How to finish hems with binding or bias tape
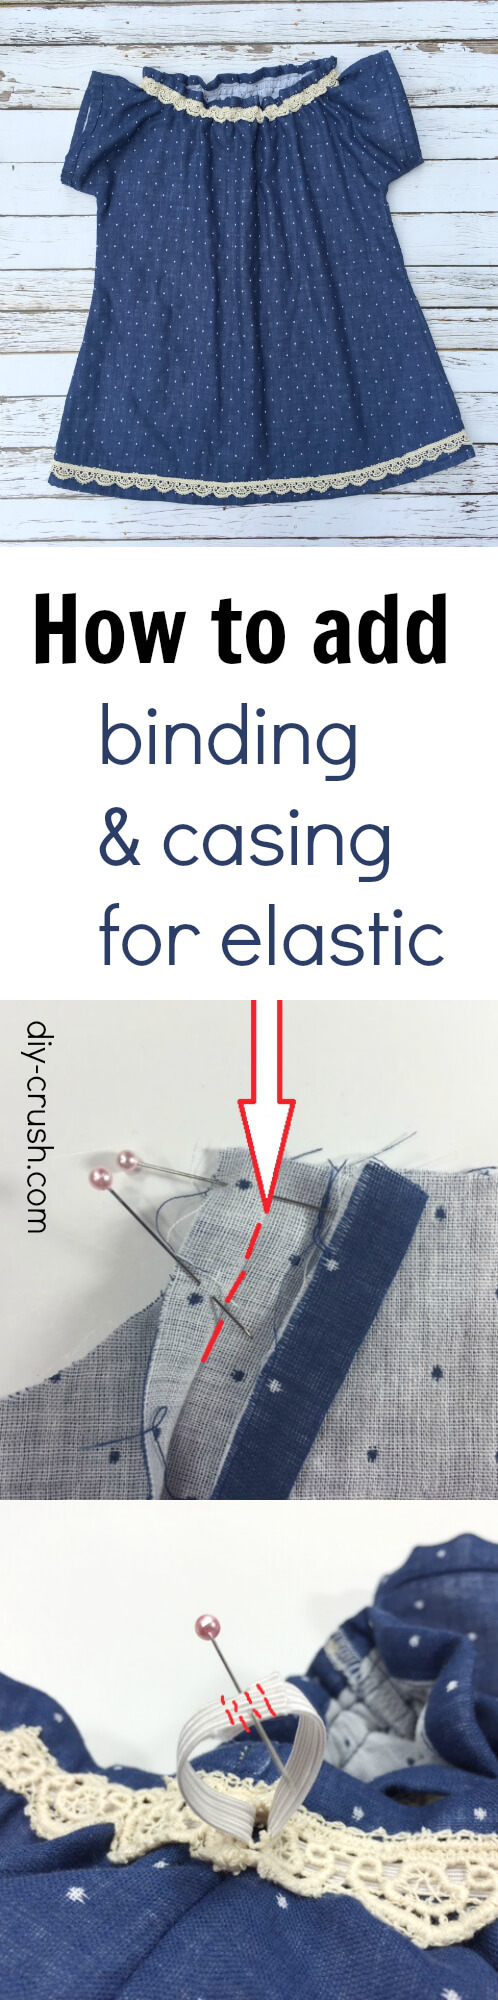
How to add elastic without shirring
Another issue could arise with patterns that call for shirring (sewing with elastic thread). Not all sewing machines are able to shirr properly so I added another quick tip to add a casing for elastic.
For this project I was able to use this amazing double gauze cotton from Organic Cotton Plus.
Pick a pattern
I picked my Whimsy Couture Boho Tunic sewing pattern because I love how fast it comes together and since it has rolled hems I thought it would be great to make a tutorial for you in case you didn’t like to do rolled hems or just don’t have a serger. So basically you can use any pattern you want that requires a rolled/serged hem. And what I also didn’t do was to sew in elastic thread. I thought it would be (also) great to make a tutorial for adding regular band elastic versus shirring. Ready to learn those two modifications?
Gather your supplies
You need the following to recreate this look:
- cotton fabric or double gauze (highly recommend this because it’s soft and works great if you add on-top elastic casing)
- notions such as matching thread, straight pins, safety pin
- a sewing machine
- no serger lol
- 1/4″ elastic
- lace with a width of at least 7/8″ (mine from Organic Cotton Plus is about 7/8″)
- scissors
- iron
- double threaded hand sew needle
- 1.5 hours
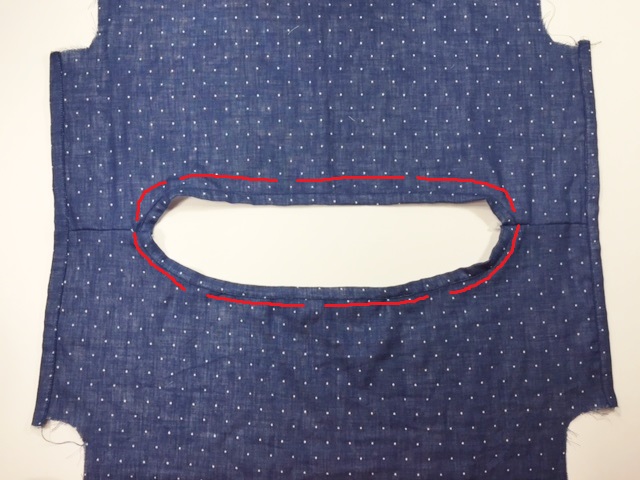
Measure the to be bound edges
Measure front and back of the neckline, sleeves and bottom hem edges.

To make the binding or bias tape
Cut your binding material either from the same fabric or from a coordinating fabric. In my honest opinion it is not necessary to cut the binding on the bias although for very curvy edges on necklines etc. you would want to cut it on the bias to allow the binding to sit nicely flat. In my example I didn’t need to do that.
You want to cut as many binding strips as necessary to cover the measured edges:
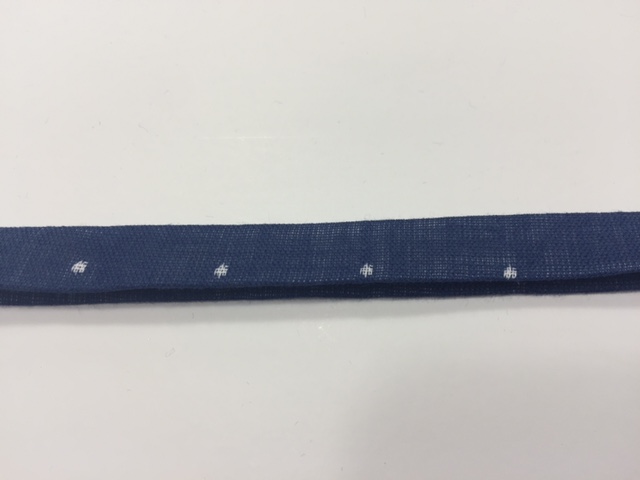
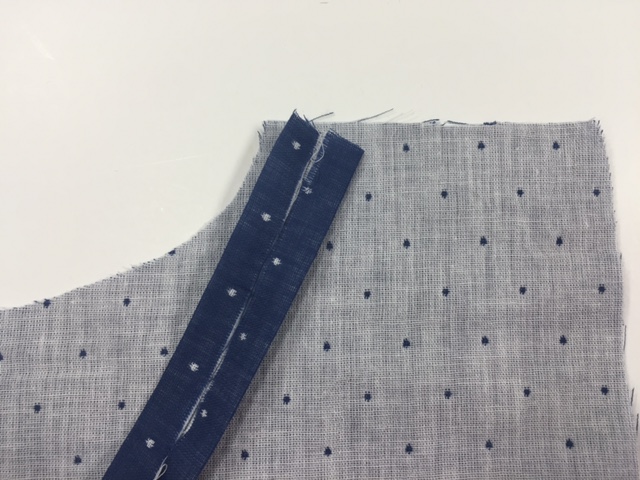
Fold the long edges half way in and press. Fold strip in half lengthwise so that the folded edges meet. Great for making binding/bias tape is a bias tape tool.
This should now be your finished binding/bias tape:
To sew the binding on
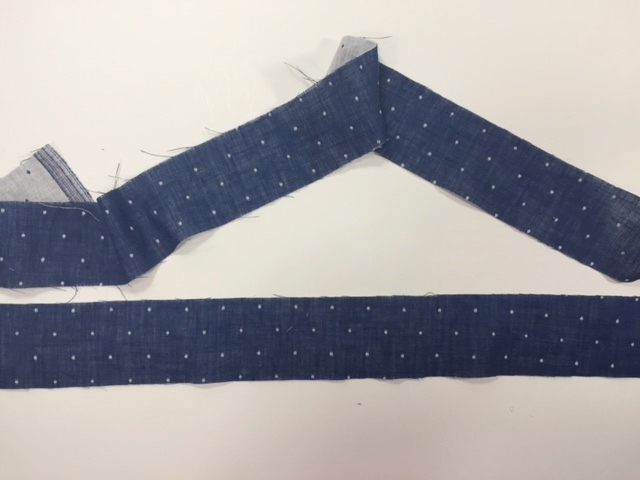
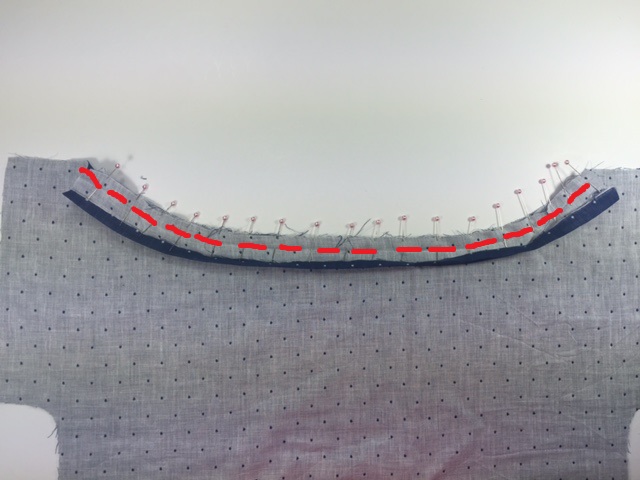
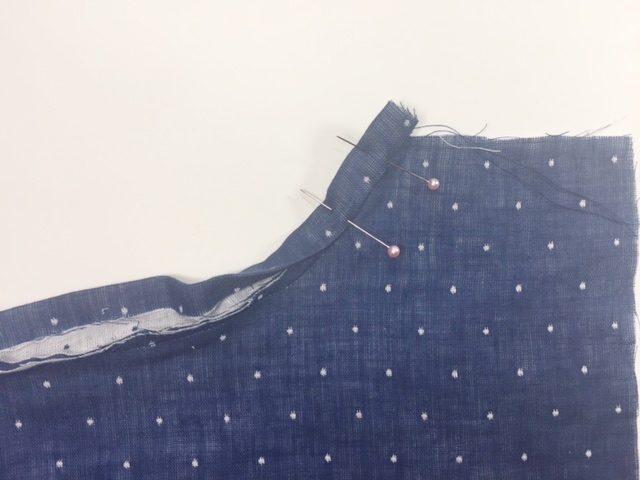
Place your garment with right side down and place the unfolded binding with right sides down along the neckline corner:
Unfold the upper binding edge so that it meets the neckline edge. Pin in place. Note: the red markings show you up close where to sew in the next steps.

Once you have pinned the binding on by placing pins every inch, sew along the red lines right along the pressed crease. It is important to stay on this fold!
This is now the sewn on backside of the binding:
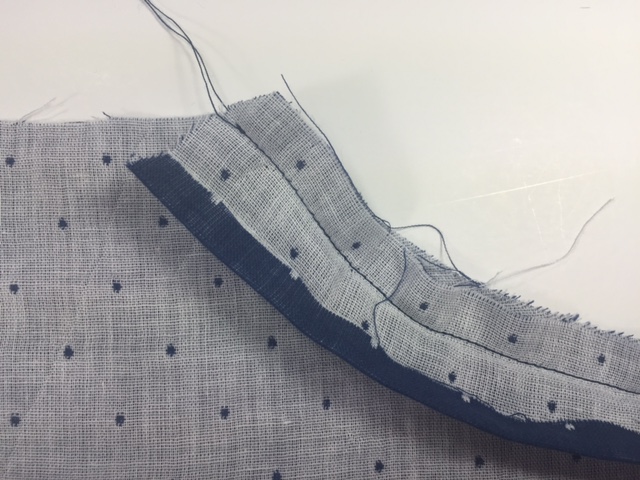
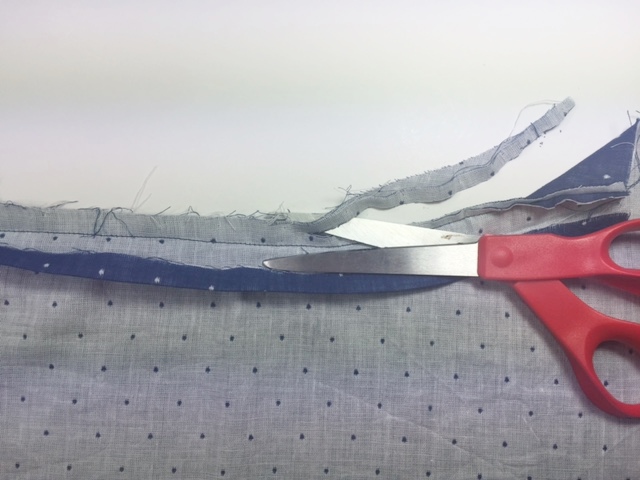
Trim off about half of the seam allowance:
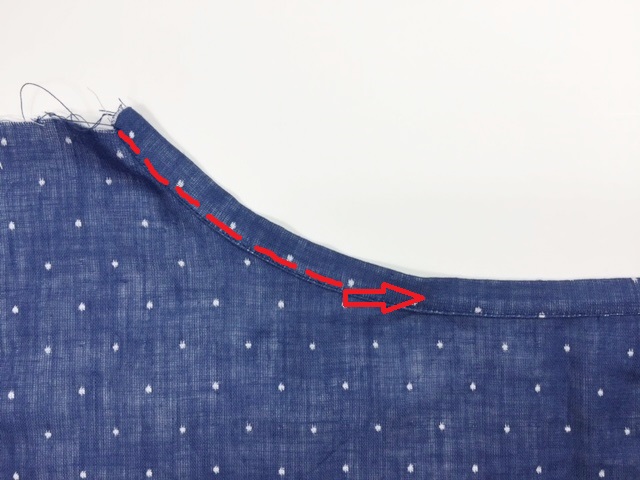
Flip your garment over so the right side of the fabric faces up. Flip the binding over and down to cover the seams and first row of stitches. Pin in place every inch:
Sew on top of the binding very close to the folded edge that faces towards the garment. Just like you would top stitch a garment:
To sew the binding to the sleeve and bottom edges you first want to sew the garment together on the shoulders so you can attach the binding in one setting on the sleeves. The picture below shows my tunic with the binding sewn to the sleeves already.
How to add band elastic versus shirring
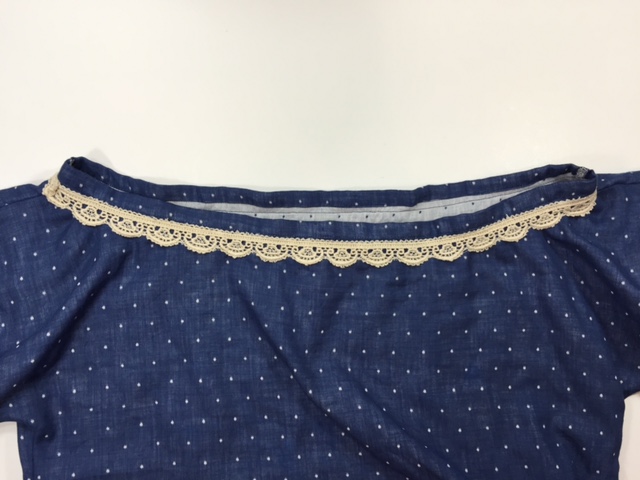
Measure the circumference of the neckline:
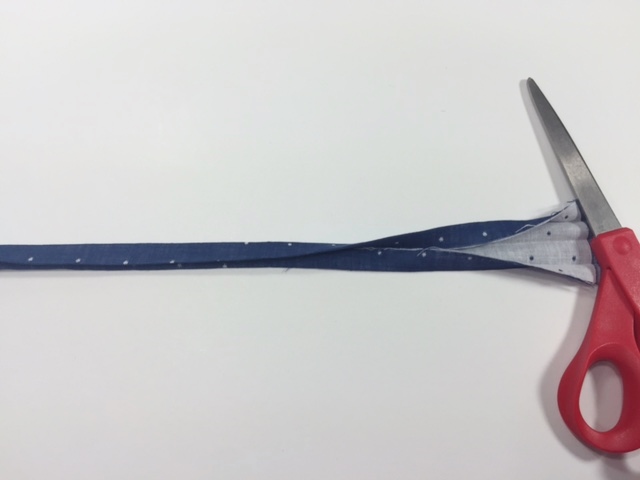
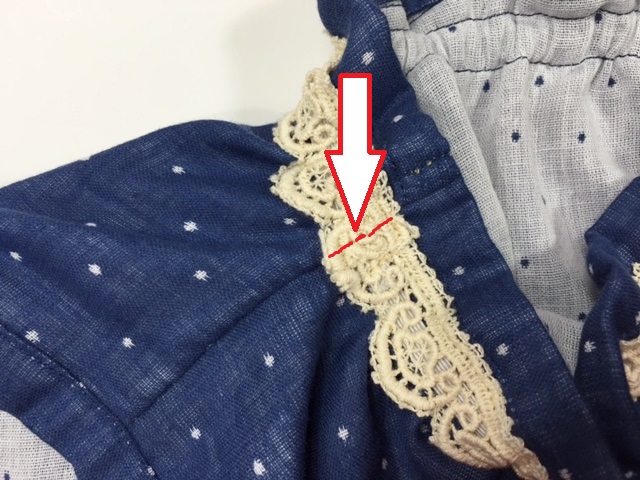
I am using the beautiful lace as a casing for my elastic. In order to make it a casing, make sure your lace is wide enough for your elastic. Pin the lace to the neckline, in my case I pinned it right under the binding. Be sure the lace is slightly longer so it can overlap on one side. Sew lace in place along the red lines. I sewed two rows 1/2 inch apart. Backstitch the beginning and end.
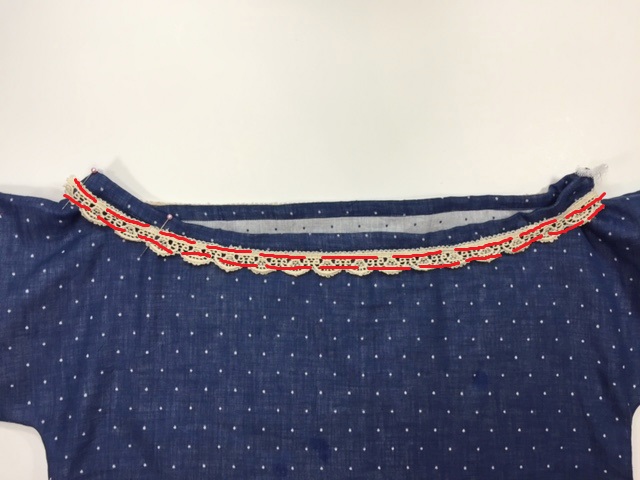
This is where both lace ends meet. Tuck under the end of the lace and let it reach over the beginning a bit.
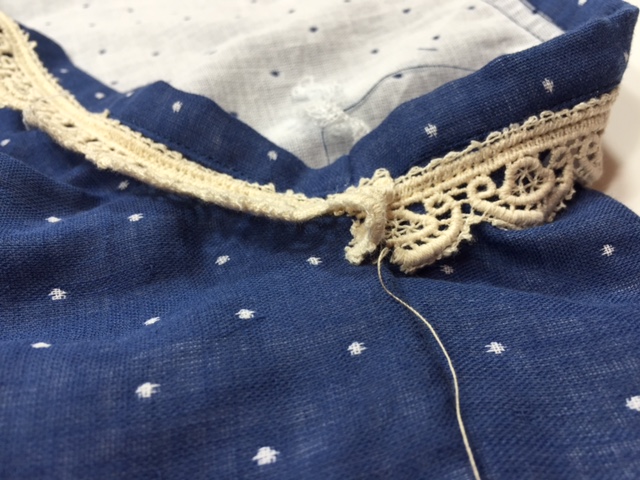
This is now my finished lace casing:
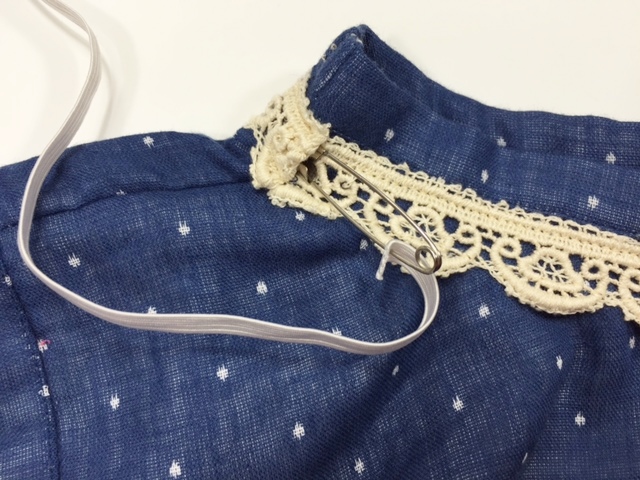
Secure a small enough safety pin to one end of the band elastic (mine is 1/4″ wide) and insert it into the casing.
Sizing guide for Neckline elastic
NB 13”, 3-6m 14″, 9-12m 15”, 18m 15.5”, 2t 16”, 3t 16.5”, 4t 17”, 5t 17.5”, 6 18”, 7/8 18.5”, 9/10 19”, 11/12 19.5”
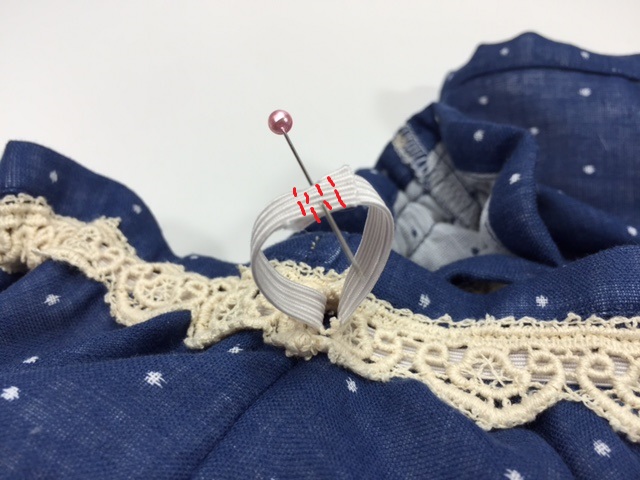
Once both ends meet, overlap 1/2″ and hand stitch both together with at least 10 stitches:
Now it’s time to close the lace casing opening with your machine:
Finish the tunic
I left one side of the tunic open so I could previously sew the binding on in one step. Now it’s great to sew the lace as a decorative touch on in one step as well:
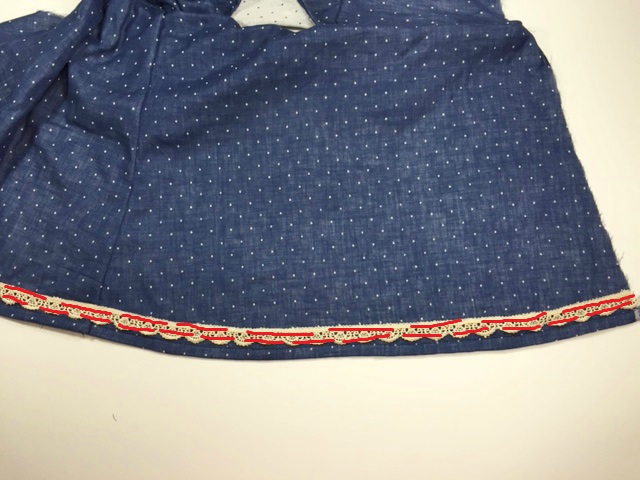
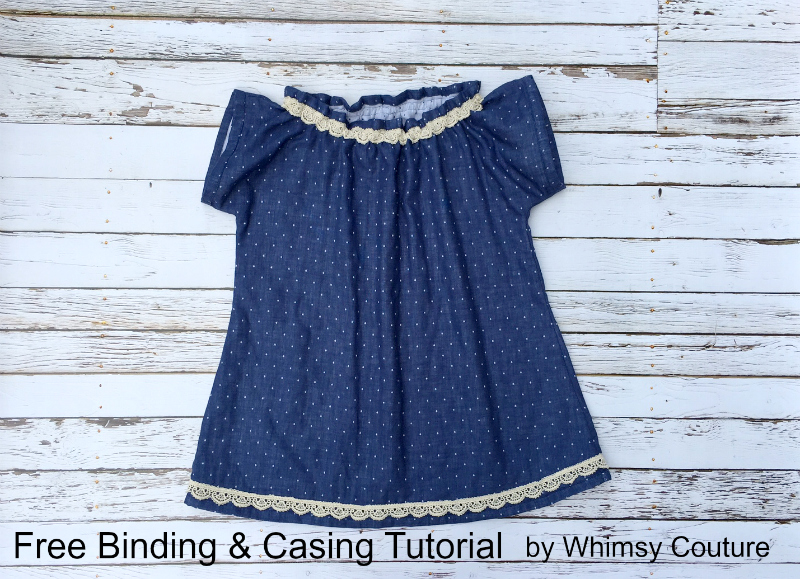
Once lace is sewn on it’s time to finish the tunic. And voila’! The Boho Tunic made with organic cotton and lace is done!

0 Comments:


 Same day shipping for most orders
 Questions? Call us toll-free at: 1-855-SEW-PURE
