

 Shibori/Indigo Dying
Wednesday, June 7 2017
Shibori/Indigo Dying
Wednesday, June 7 2017


A little different than tie dye, Shibori is a Japanese method of dyeing patterns by twisting, binding, wrapping, folding, and stitching. The main dye used for this technique is Indigo because of its easy to create resist patterns on fabric.Organic Cotton Plus offers indigo vegetable dye and all the supplies you need for dying, here.
You’ll also need natural fabrics. For this I used Organic Cotton Plus's white Sateen here, to date this is my favorite in the way it takes the dye. It really makes a difference in the shade of the indigo when using 100% organic/natural fabrics. My designs were much more vibrant and the resist portions were bold. They offer all types of natural fabrics from silk to knit jersey. The fabrics are sustainably made and eco-friendly. You can read more about them here.
Below I share with you my tips for a successful Indigo/Shibori session and some unique techniques that create stunning results.


Make samples from small squares to experiment with before the final fabric.
Tips:
Have a plan: Before preparing your vat and your fabric have a plan. I used to just go with the flow but now I like to have set designs and projects in mind. It keeps things organized and then later on your not wishing you had more of a certain pattern or less of other patterns.
Create Samples: I use test squares of 12x12 in. of the fabric I intend to dye. That way they're small enough you're not using too much fabric but large enough you can use them for projects (i.e. bandanas, pillows, zipper pouches, purses, quilts, baby booties, etc.) Especially if you have nice fabric or a project in mind you’ll want to create samples to get close to your desired results. Also keep in mind scaling for bigger patterns and how you’ll want to adjust the pattern size. This is a good time to experiment with different patterns and also test techniques you want for specific projects. Again, it’s great to have a plan as to what you want to do with each square. Then I’ll set aside 3-4 samples for the very end that I can experiment with.
Take notes! How long you should leave the fabric in? What fabric did you use? What binding techniques you used and the steps (I’l take photos not only for my blog but for myself). This helps especially if you’re using several different patterns…Jot down suggestions for next time or dyeing larger pieces of fabric.
Have a project in mind: For this dye session I had specific projects I wanted to use the fabric for. I usually sketch out the design but also can change things up along the way. Before dyeing my fabric I cut the pattern pieces out and then dye each piece.
Don’t rush! Shibori and Indigo dyeing is a process. The vat stays good for a few days and the Organic Cotton Plus Vegetable Indigo dye you can dye up to 2 1/2 lb. of fabric so that’s a lot of dye to use and plenty of time. If you want lighter shades of indigo save those for the end when less dye is available. It’s a process of binding and using stitch resist techniques so take your time. I enjoy keeping my hands moving so I put in a good movie and get to it. I also have kids so I save the techniques that take time for evenings when they're sleeping.
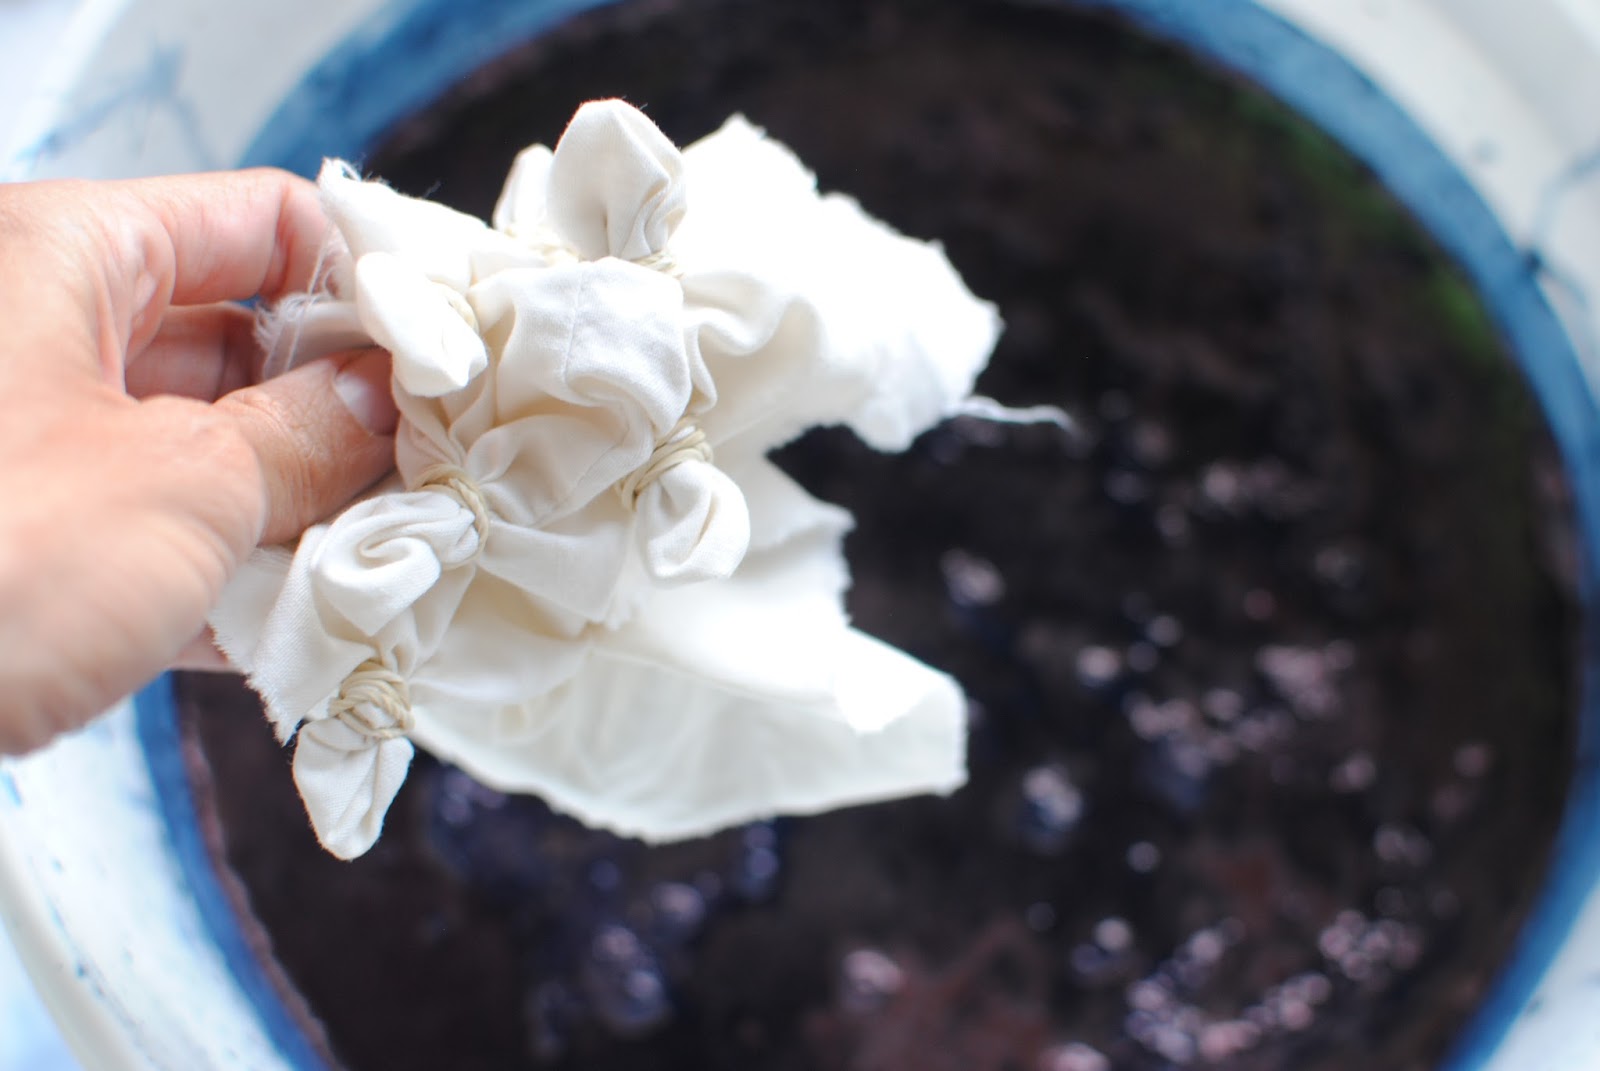
Wear clothing and shoes you don't care to get messy. You will get dye on you no matter how hard you try not to. So wear clothing and shoes that you don't mind getting indigo on. For me I just wear a previously dyed indigo shirt (with no set pattern) and flip flops. I always wear gloves but my hands still get dyed because I choose to remove the rubber bands and thread with bare hands mainly because it can be difficult with gloves on.
Dyeing time: For me I leave mine in for a good 2-3 minutes and will remove it from the vat and let it “oxidize.” If I want it darker then I put it in again for a minute or so…If you want a lighter shade you can just quickly dip it in, agitate it a bit and then remove it. Also if you want lighter shades for certain fabrics, save them for the end when there is less dye left in the vat. You can even add more water at this point and it get some lovely light shades of indigo.
Techniques:
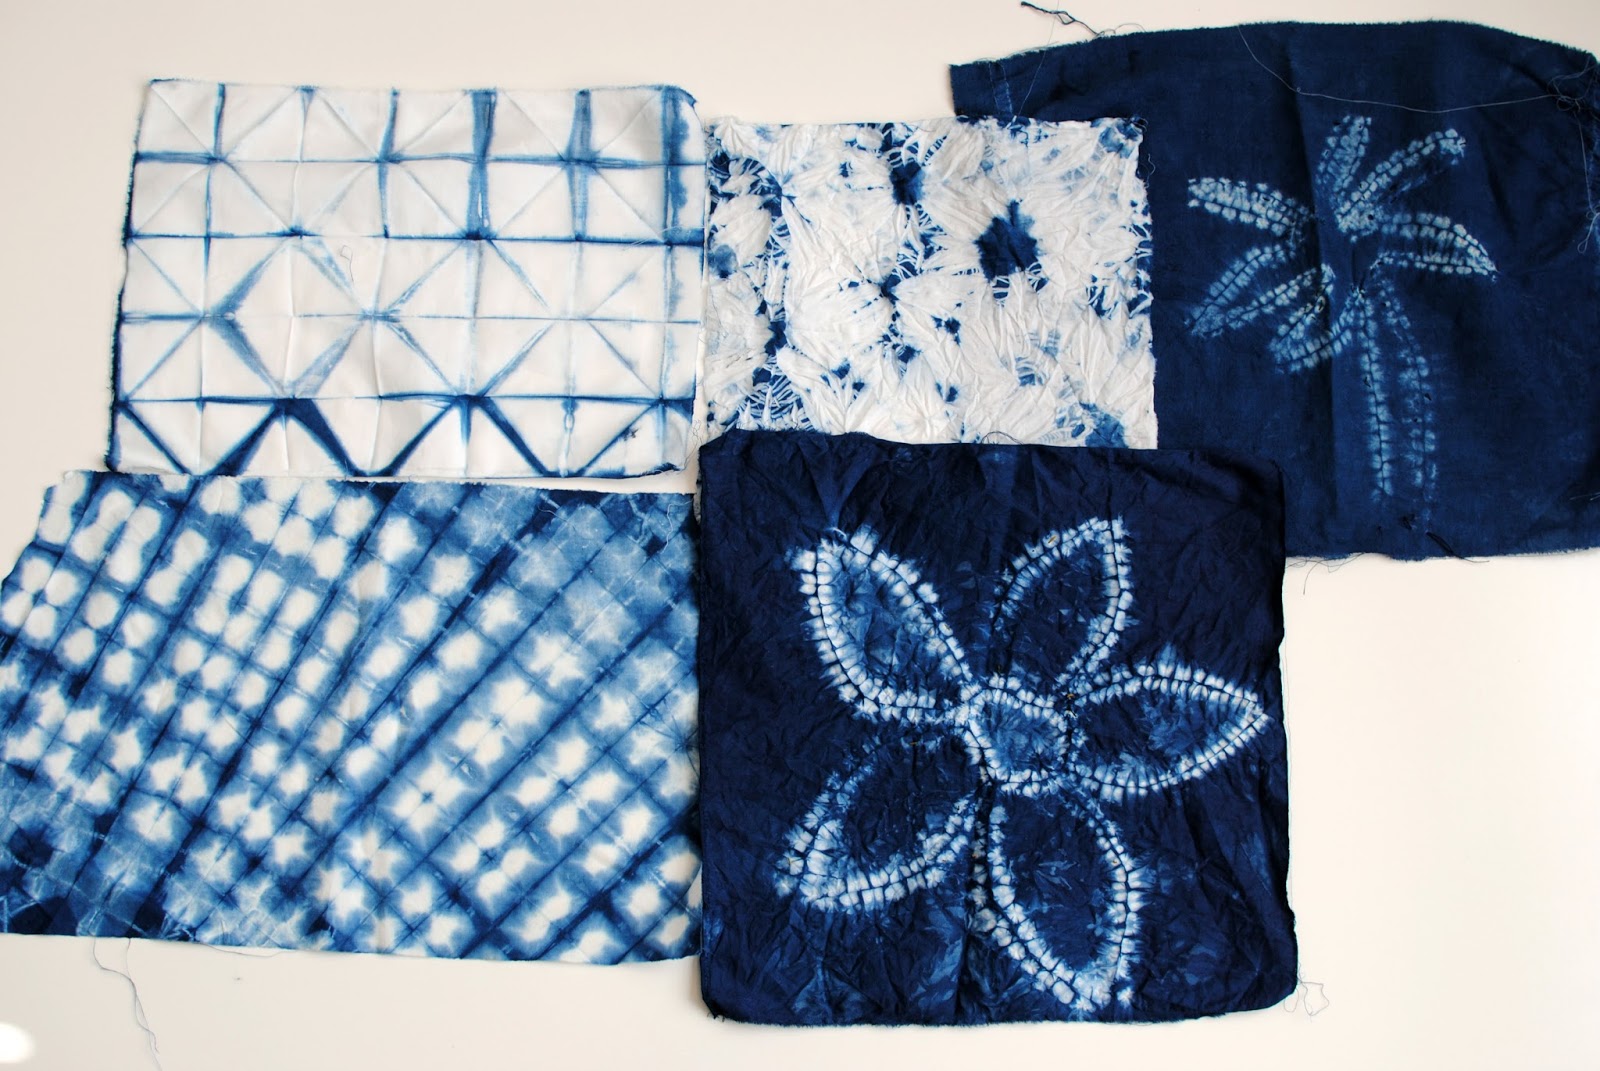
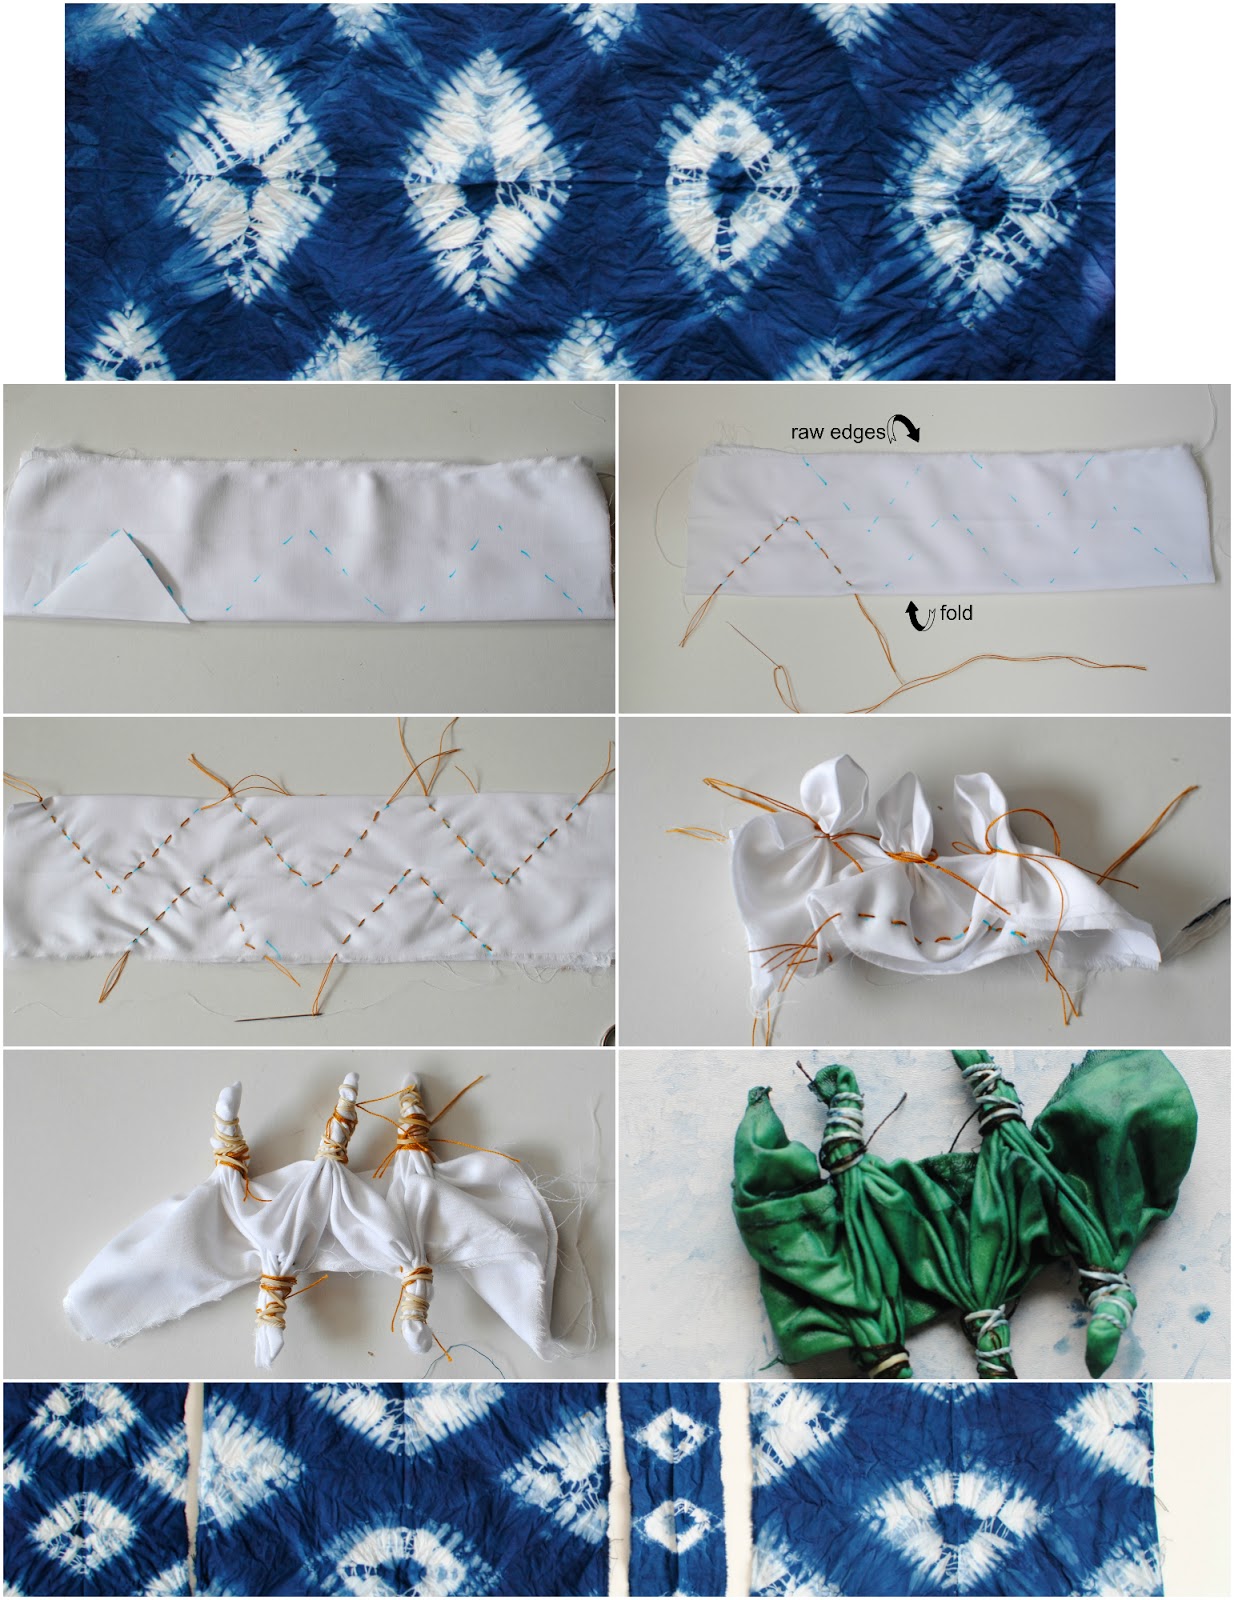
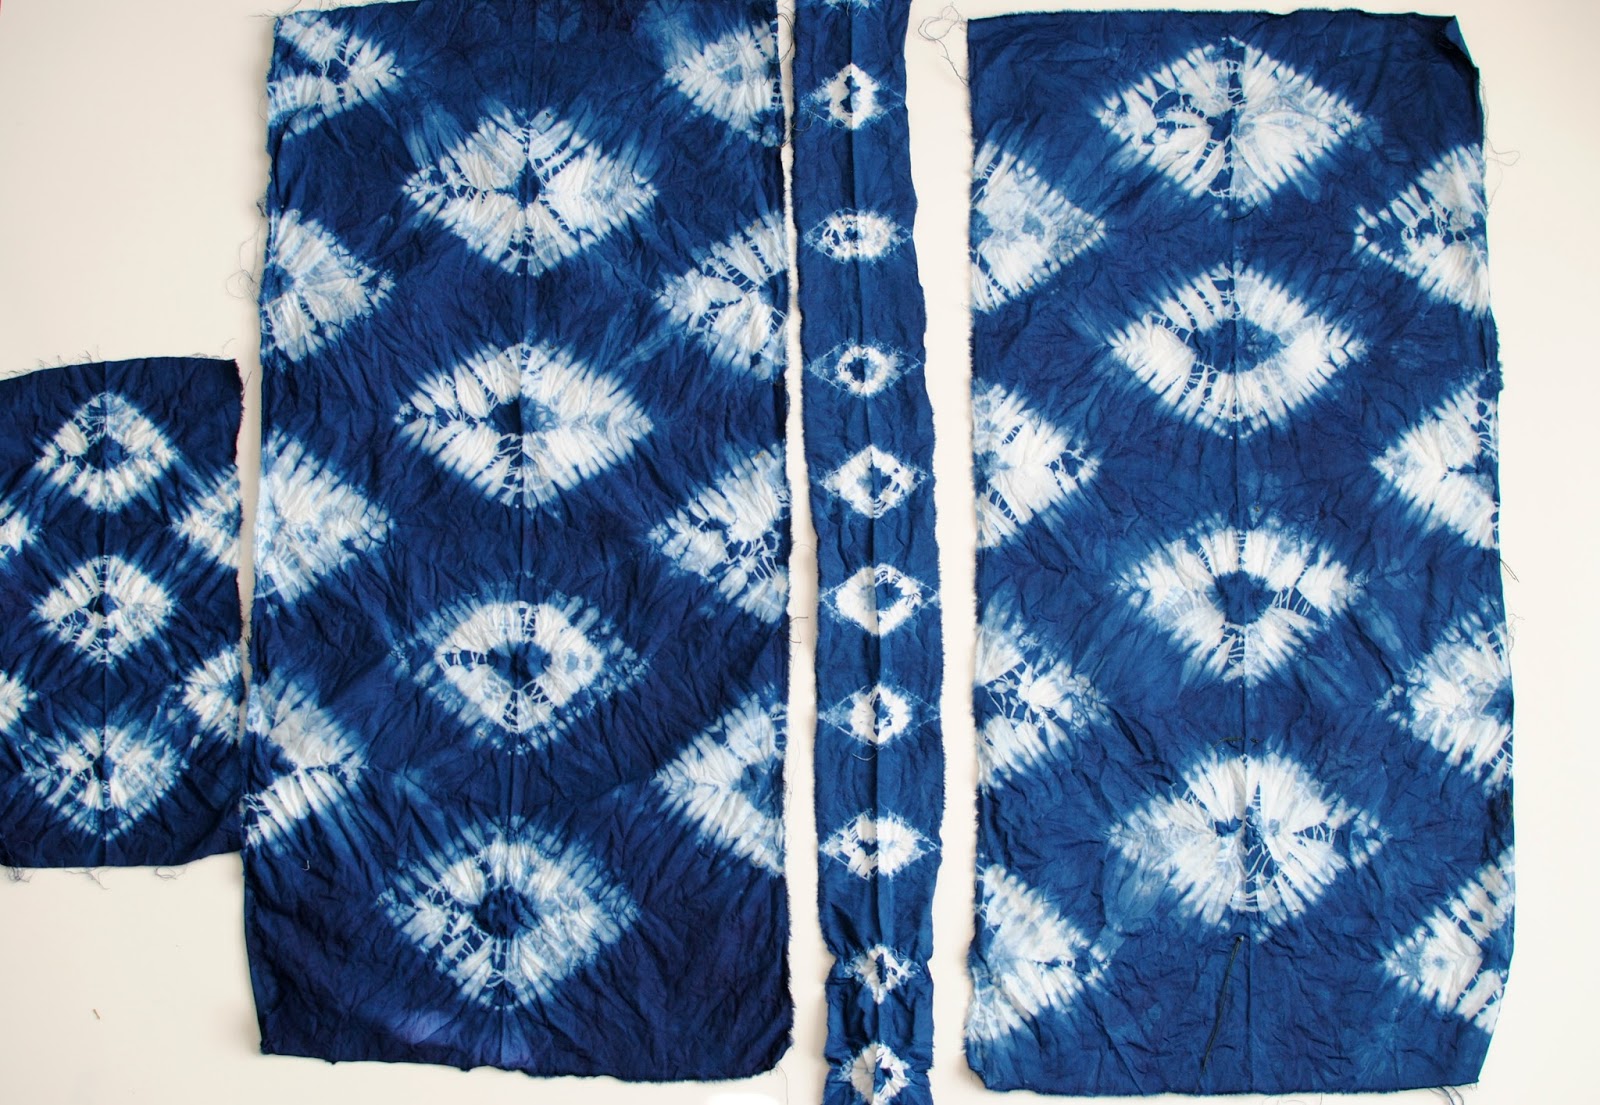
Now for some Nui Shibori (stitch resist dyeing). This is a simple running stitch used on the cloth, then pulled tight to gather the cloth. Each thread is then secured by knotting before being dyed. It’s a bit more time consuming but allows for control of the pattern you’d like to create. Full video below or follow the steps.
Komasu Shibori: Fold your fabric in half. Create a template or free hand and draw triangle shapes along the folded edge and the raw edges. I use a water erasable pen as it disappears in water. Then use a running stitch with heavy weight thread (for buttons or denim) and trace the marks. Pull the stitches on the side without the knot till they're nice and bunched up and knot the end a couple times. Once they're all scrunched use rubber bands around the tips. Dampen the cloth (you don't want it soaking wet just barely damp) and place in the Indigo vat. I wanted a deeper shade of blue so I placed mine in for 3 minutes. Let the dye oxidize and then I let it dry till it's just a little damp and then remove the rubber bands and stitches with embroidery scissors.
Here is a pattern I had cut out and dyed using this technique. I'll be sharing this project in another post soon.
Stitch Resist: Creating Prints
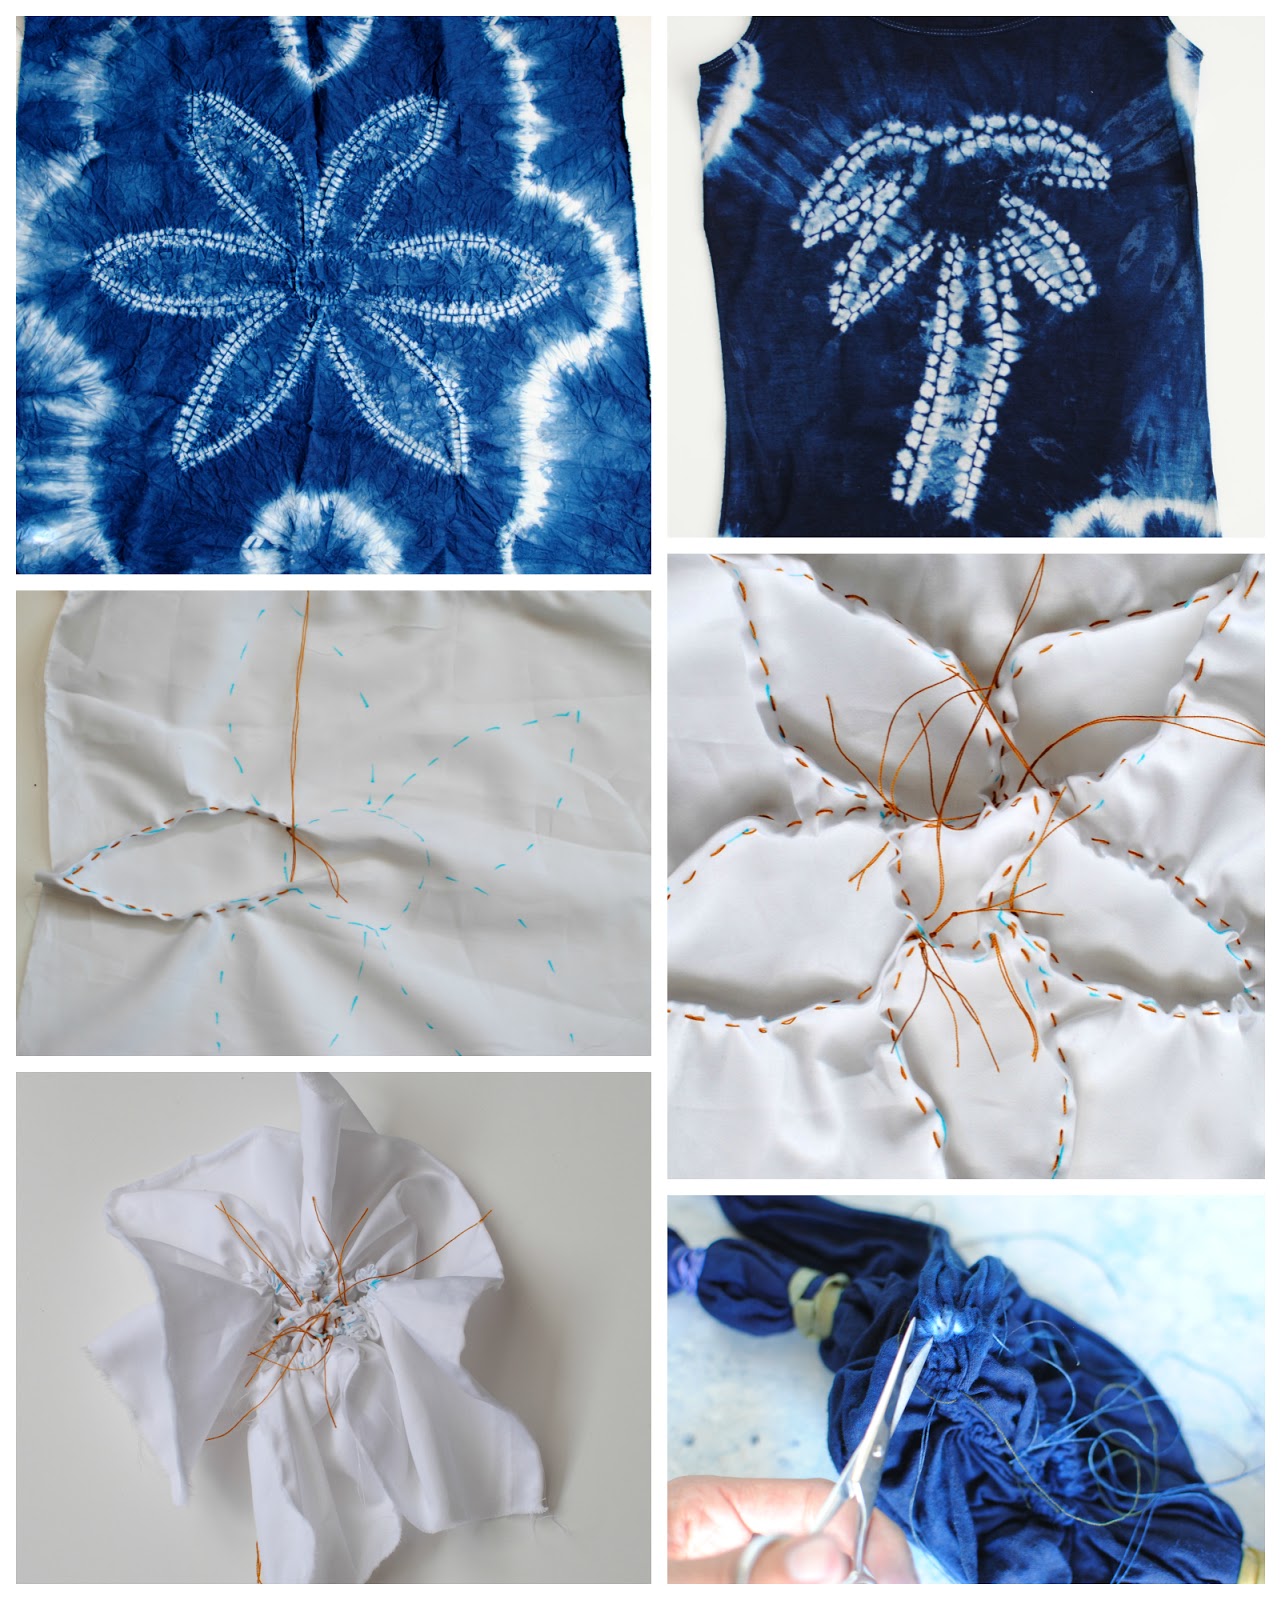
This is similar to the one above but in this one you will create a design on paper first. I then placed it underneath my fabric and traced it with my water erasable pen. This time though I used a running stitch but I folded the fabric while I did it as shown in the photos. I also did an individual set of stitches for each petal (or section) for when you pull the threads. Scrunch it up and dampen it lightly. Place in the Indigo vat for 2 - 3 minutes or until you've achieved the shade of indigo you like.
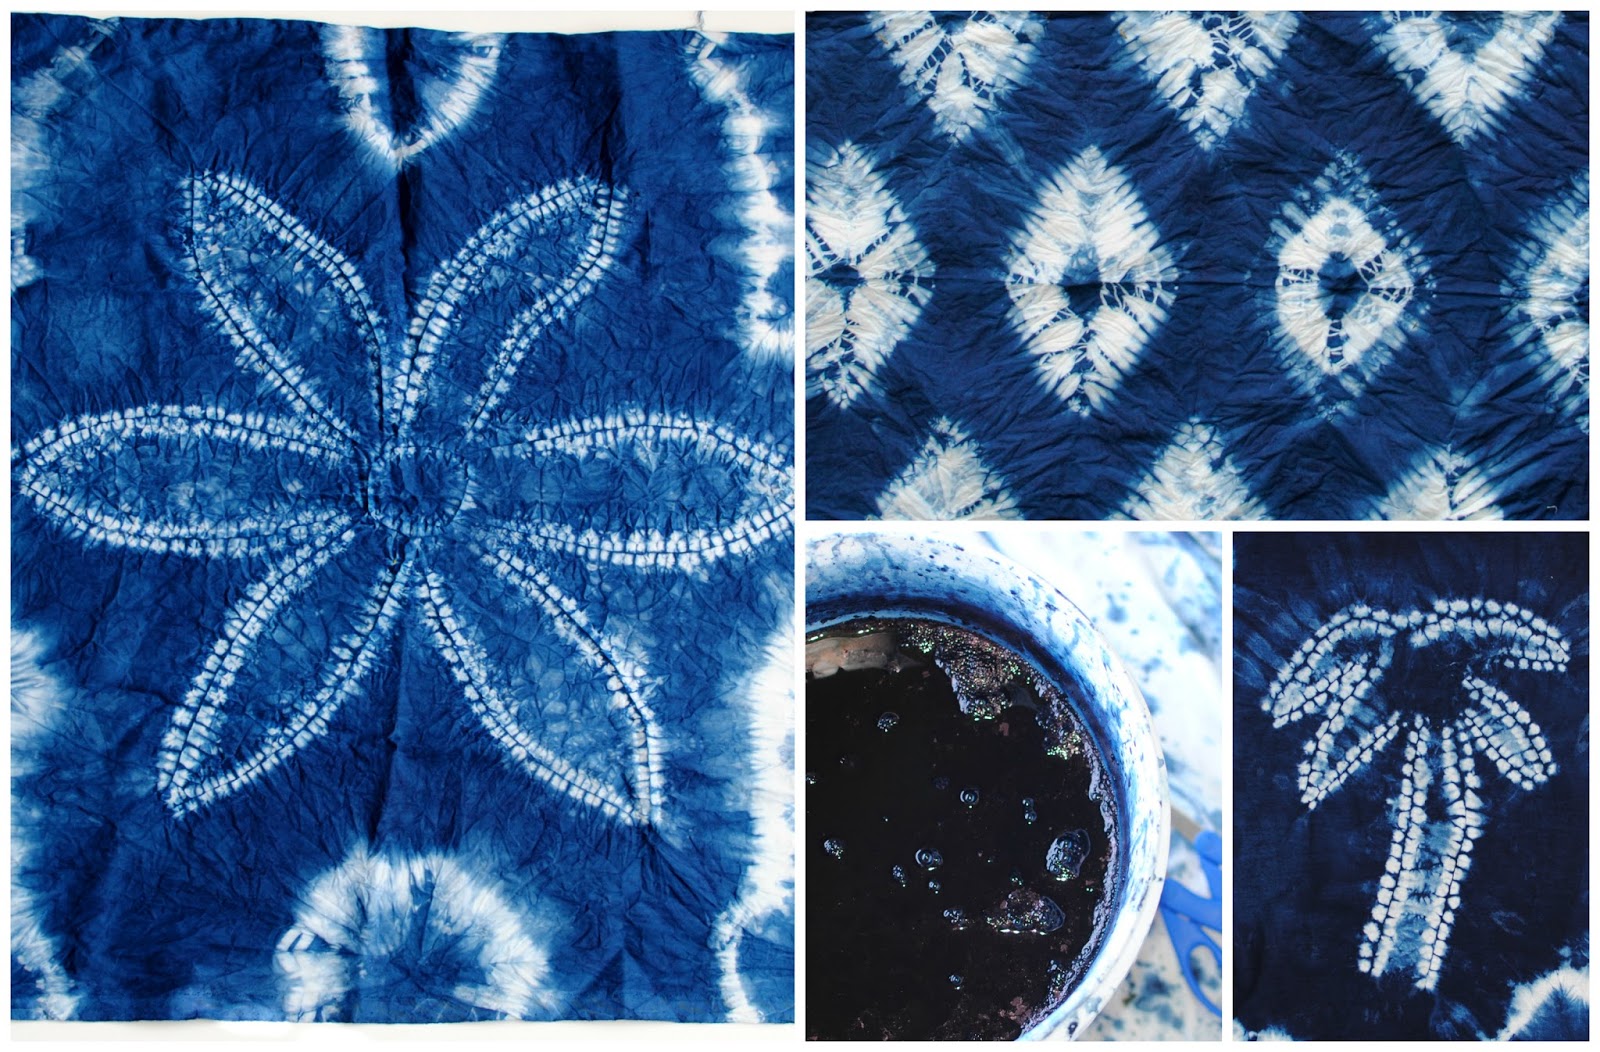
These were my favorite of the samples and final designs. They're different from your basic shibori tutorials and easy to customize. I'll be using some of these in my new studio and even a cute theme for baby Louie's room. I'll be sharing more on that later.
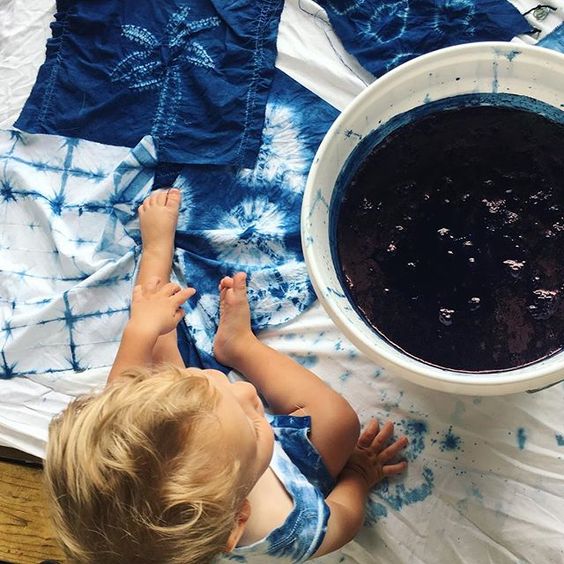
Shibori is a fun summer activity for my boys' and I and we look forward to doing it each year. My boys' are becoming pros and at the end of the dye session (usually lasts 3-5 days) we take the sheet we used to protect our deck and dye it together to finish off the vat. It's a great new bed spread or set of curtains...
Check out Organic Cotton Plus for more natural fabrics, supplies, notions, and dyes.

3 Comments:


 Same day shipping for most orders
 Questions? Call us toll-free at: 1-855-SEW-PURE

Very interesting – how do you get the blue square outlines on white? Would love to see the sheet after you dye it at the end of your dyeing project -
Hi Melinda,
For this the square outline all we did it fold it into an accordion like pattern and then clamped it with wood and rubber bands.
Me parece hermoso todo lo que has compartido . Gracias por tu generosidad!!! Saludos